
One negative. A different print.
Keep the film and paper fixed. Change print exposure for density, then use cyan, magenta and yellow filters to change the colour balance.
Free with included negative films and Portra Endura · additional films and papers with Pro
In this guide
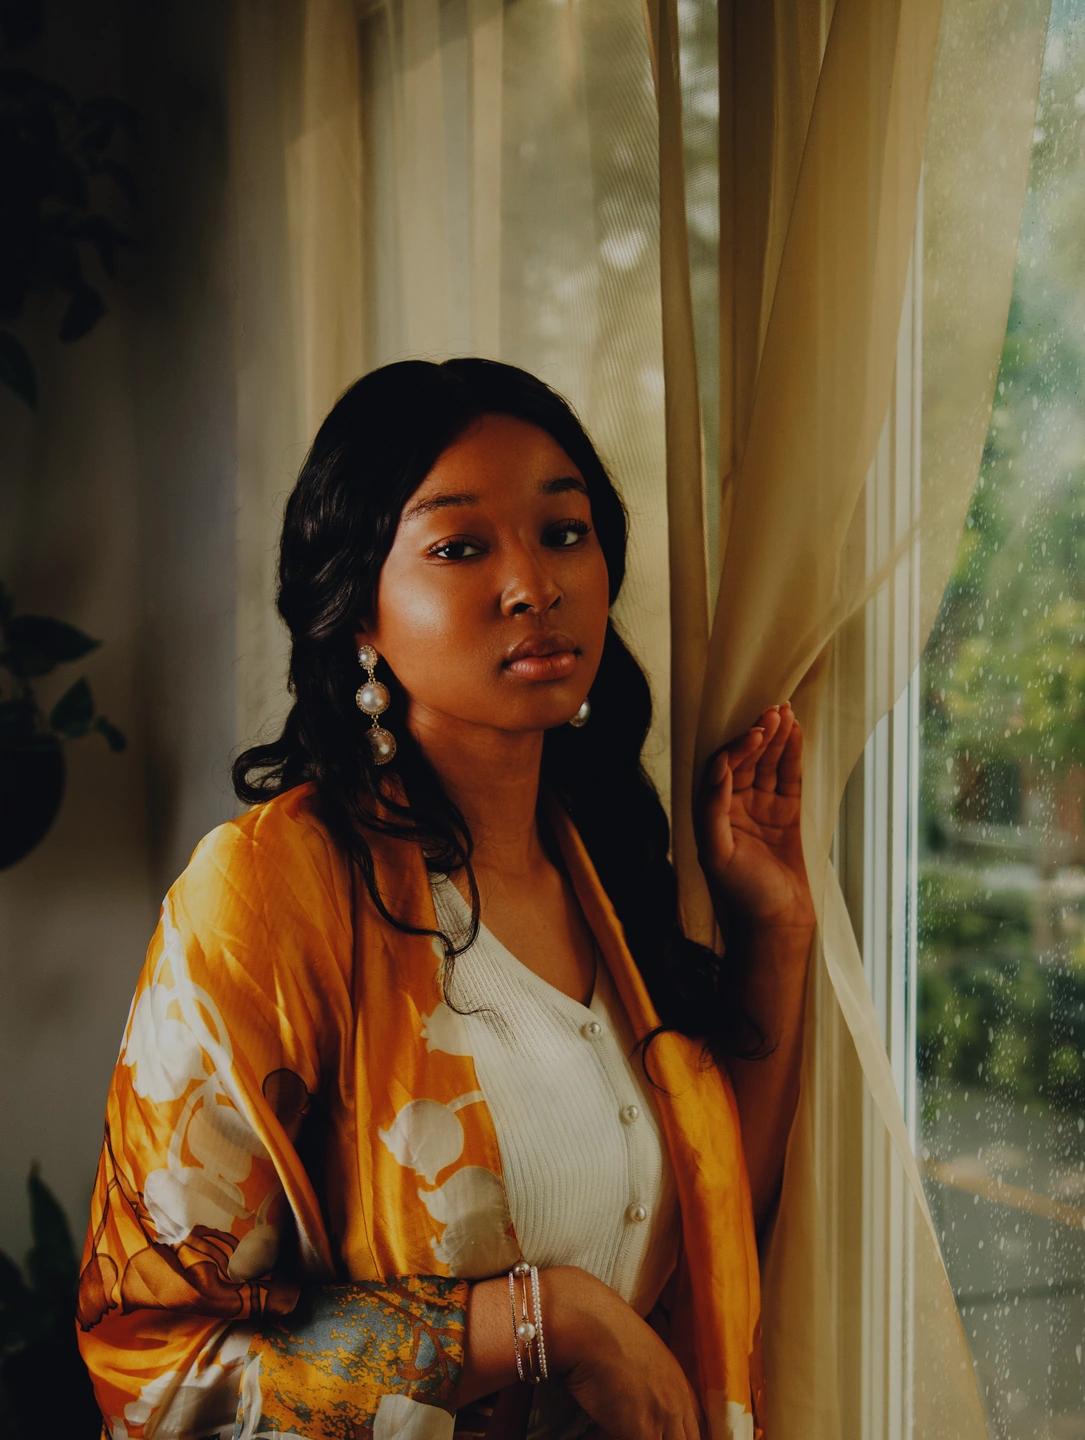
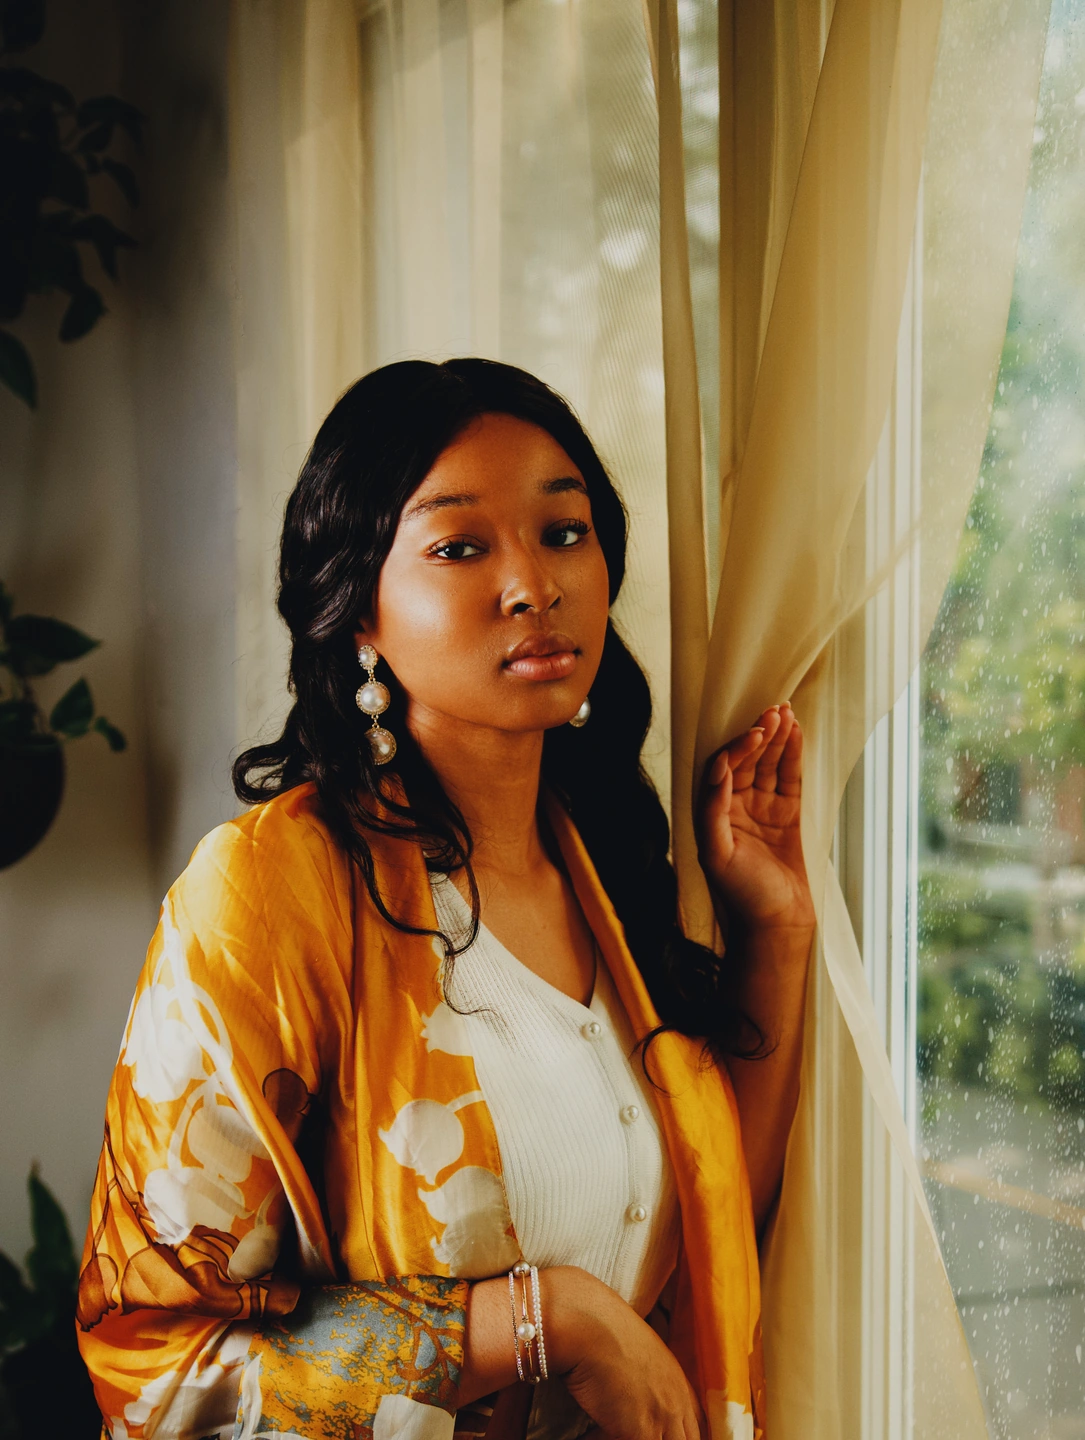
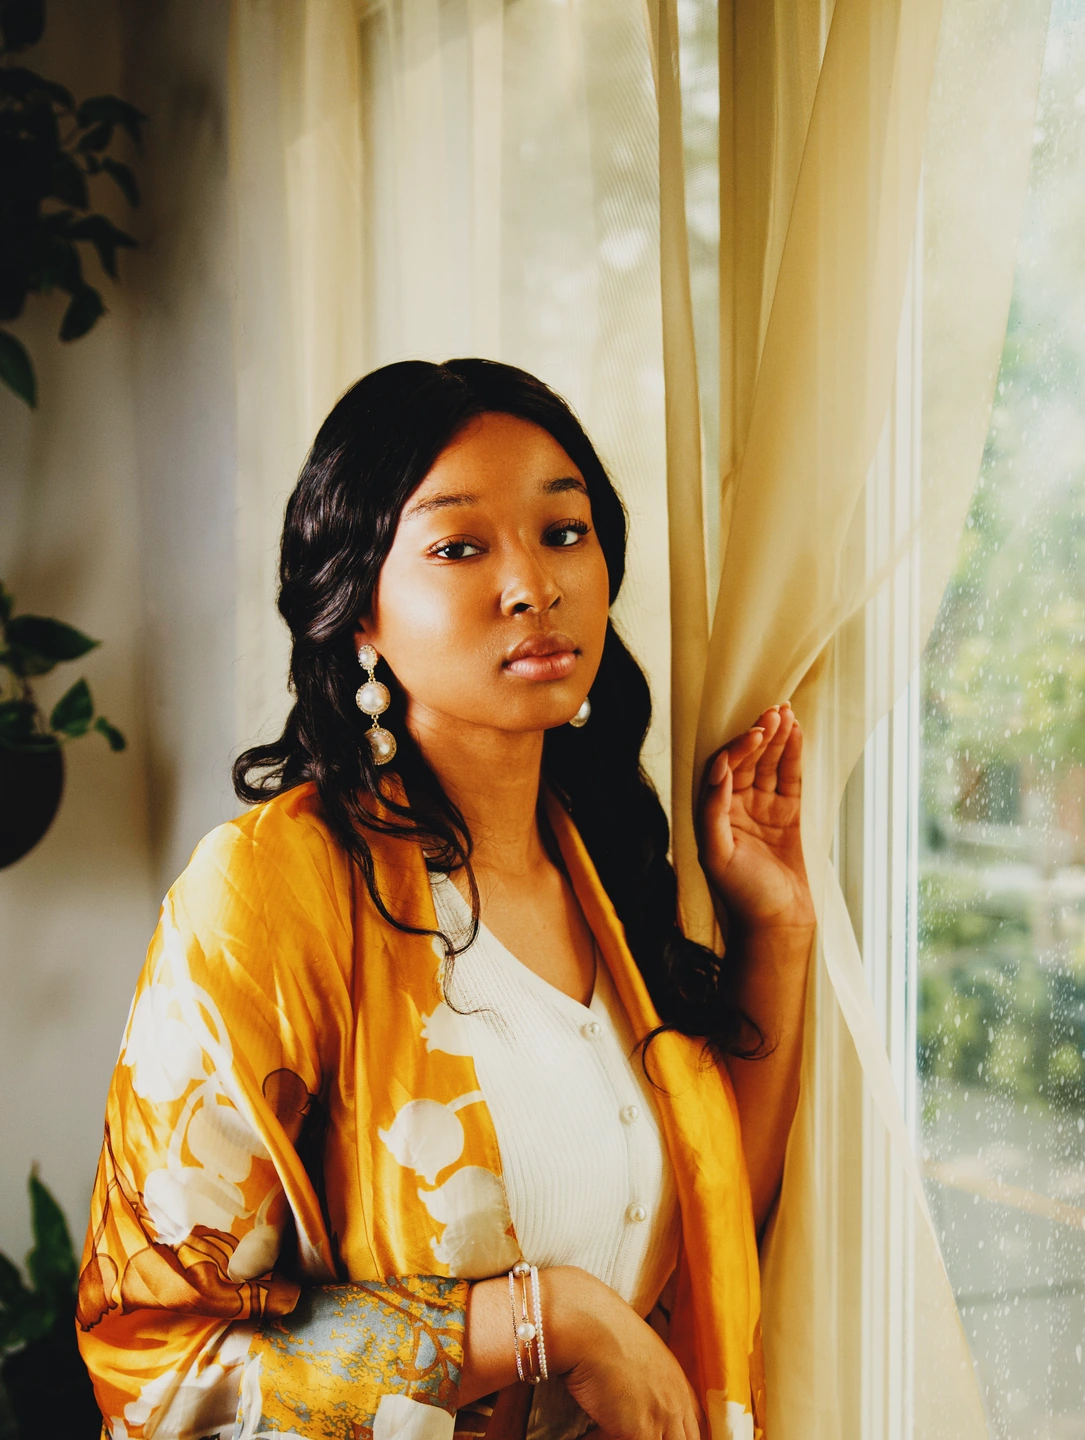
More paper exposure makes a darker print
Both sides use Gold 200 and Portra Endura. Watch the pale shirt and the shadow under the hair as print exposure rises from 0 to +0.5 EV. The separate image shows −0.5 EV. The source photo, film exposure and colour filters stay unchanged.
About these controls
- Print exposure
- In Printing, positive values expose the paper more and darken the result. Negative values lighten it. Start with a small change and compare the shirt, skin and deep shadows together.
- Exposure and Photo correction
- These adjust the photo before the film treatment. Raising either brightens that input; they are not substitutes for changing the paper exposure. Photo correction stays with your photo when you switch presets.
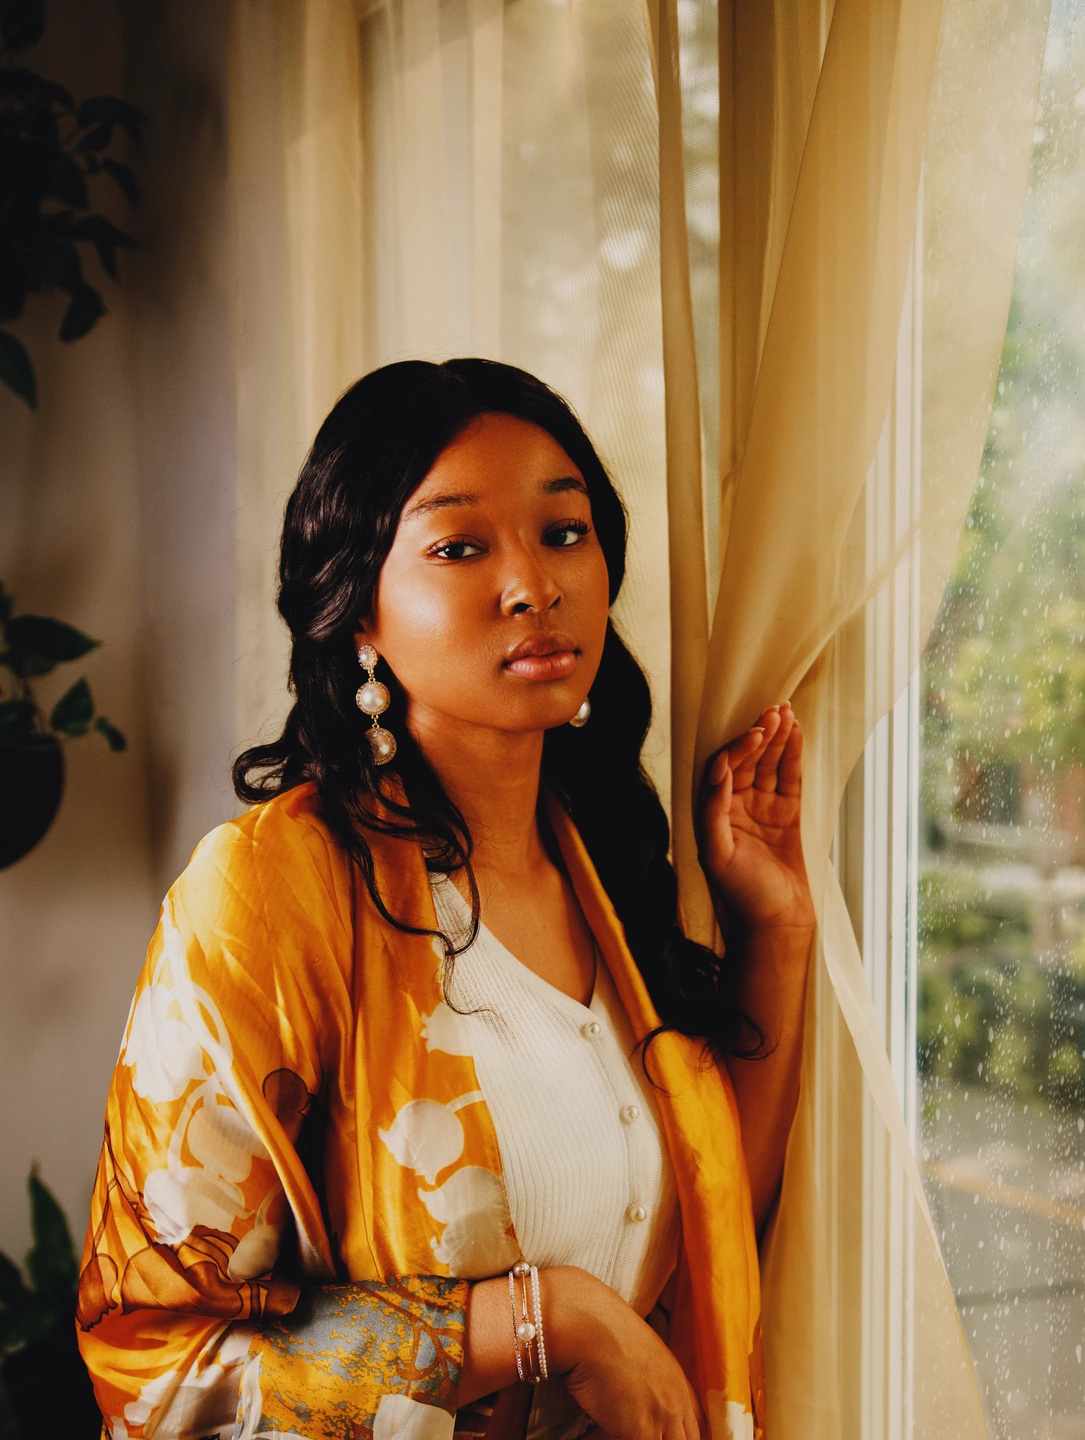
Change one filter. Keep the skin in view.
These three prints start from the same neutral settings above. Only the named filter changes, to +20. Compare the pale fabric and cheek across the set: a colour adjustment affects the whole print, including colours that already looked right.
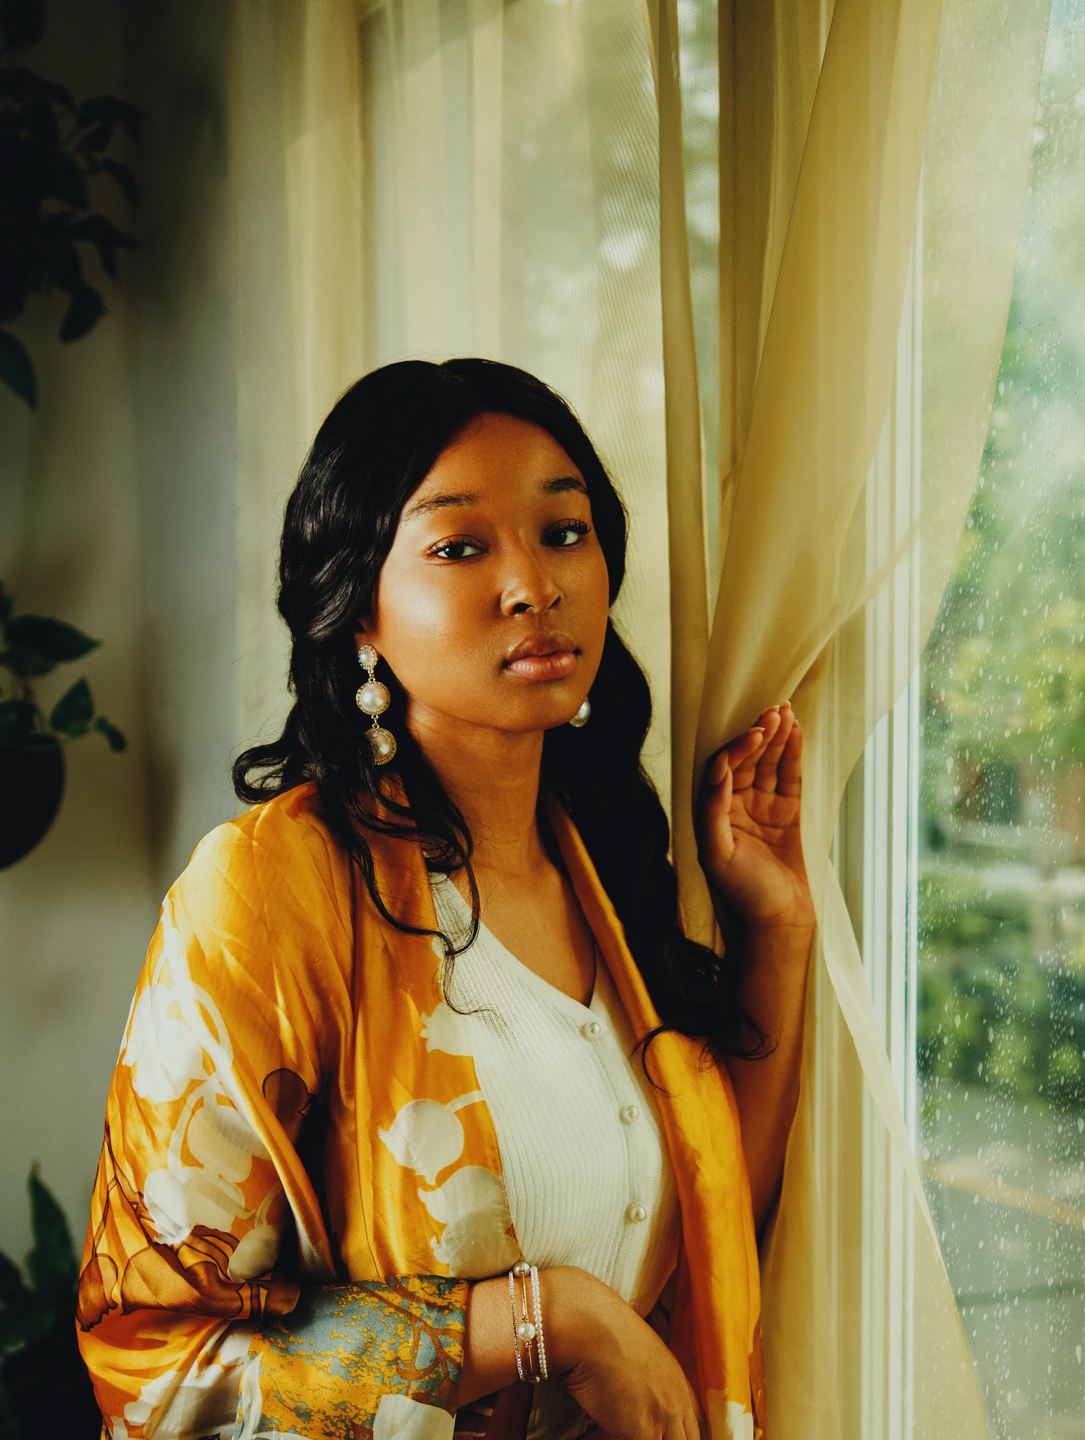
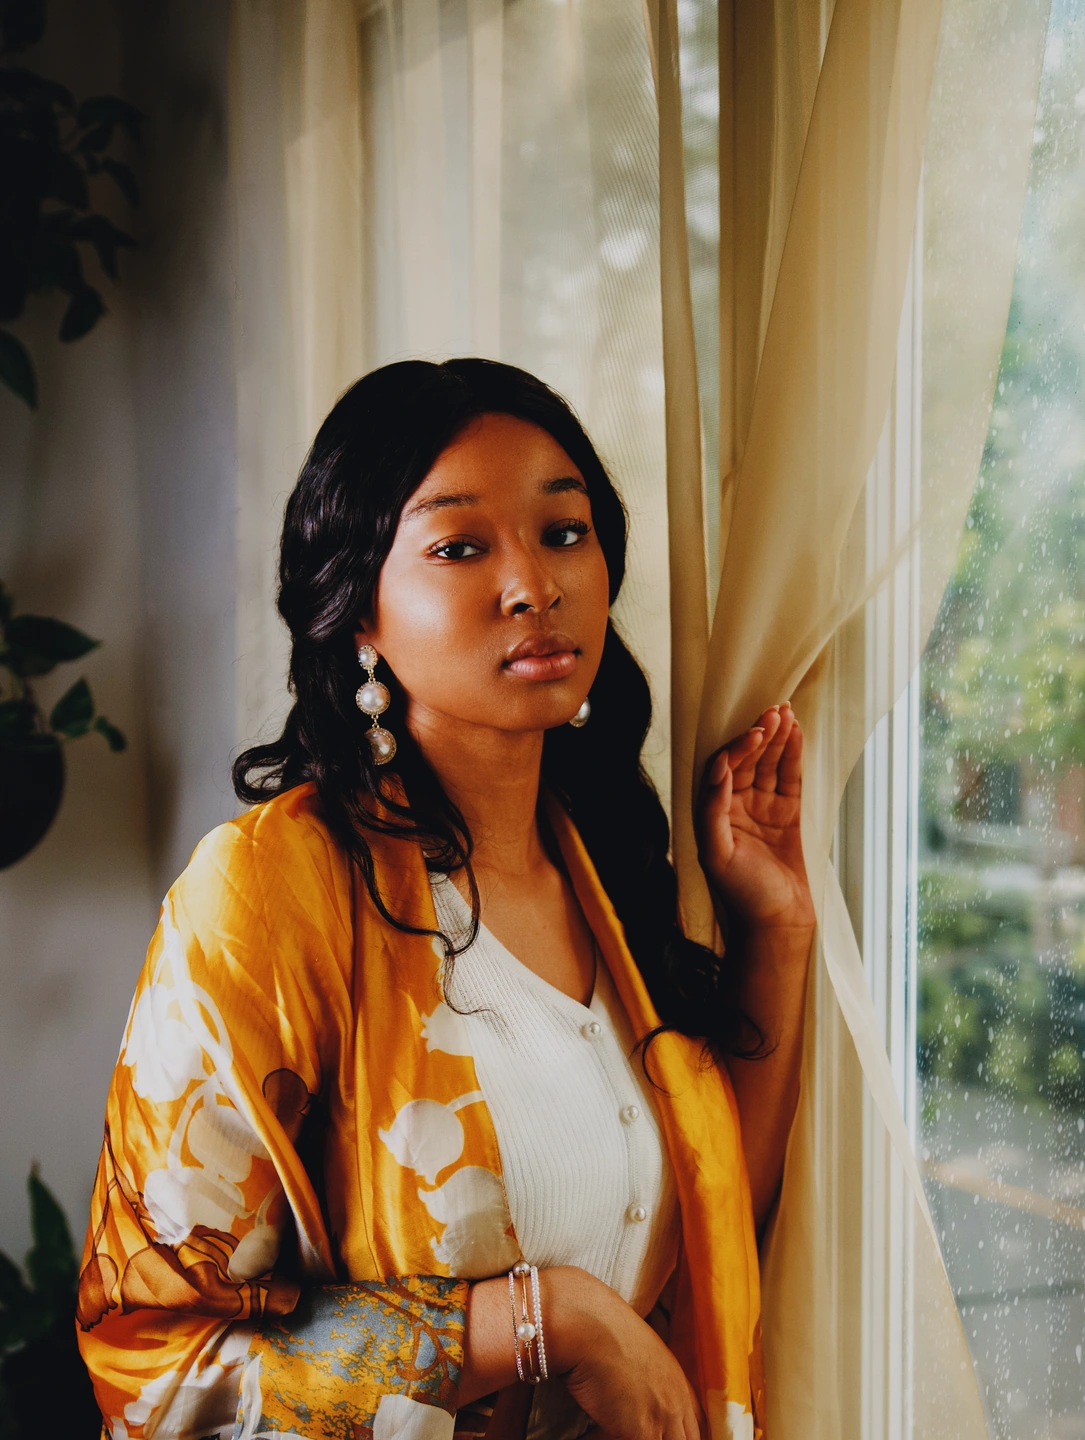
About these controls
- Cyan, Magenta and Yellow
- These filters change the light reaching the simulated paper. Positive Cyan reduces red exposure, Magenta reduces green, and Yellow reduces blue. The final colour also depends on the film and paper: judge the photograph, rather than treating a filter as a colour overlay.
- When Printing is available
- Choose a negative film and leave it enabled. Slides such as Velvia use a direct scan, and No film has no print stage. Printing controls are inactive in those modes; their settings return when you select a negative again.
Make the print after choosing the film
- Open Film, select Gold 200 and choose Portra Endura in the Print selector. Keep this pair fixed while comparing Printing adjustments.
- Open Printing. Try Print exposure +0.5 EV, compare, then reset it. Use −0.5 EV for the lighter example.
- Try one colour filter at +20 with the other two at 0. Return to the whole photograph before combining adjustments. Export a JPEG to keep the result.
Print exposure and filters are saved in personal presets. The filters use a relative creative scale; they are not calibrated physical darkroom CC values. Frames adds a border and is a separate tool.
Save the film, paper and print settings togetherMade with Photonica. Before images retain the photographer’s original treatment. Film and optical effects are creative interpretations. Source photographs are credited beside each study.